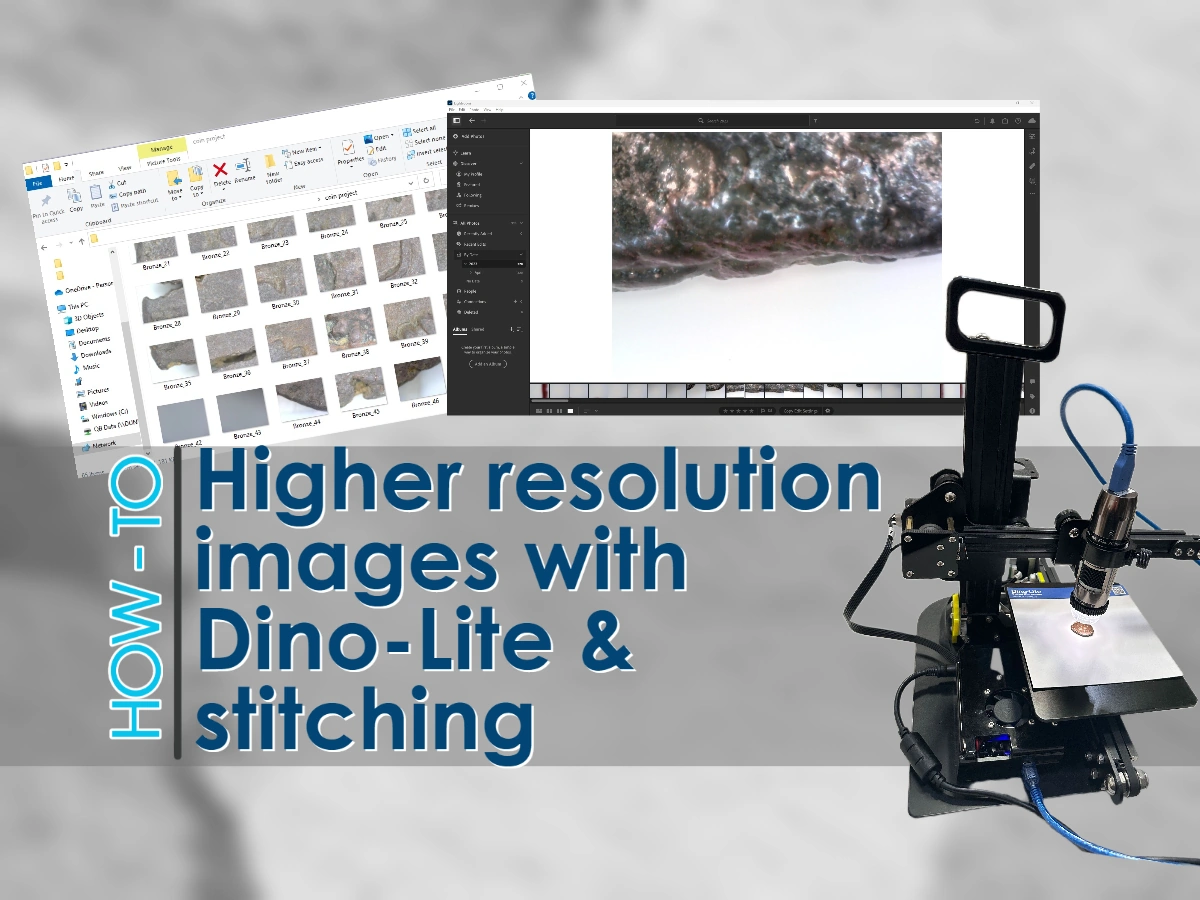
Capturing high-quality images can be a fascinating endeavor, allowing you to explore intricate details. In this step-by-step guide, we will walk you through the process of creating stunning coin images using a microscope, specialized software, and precise techniques. However, this stitching technique can be done with most items.
By leveraging the power of the Vision M1 Controlled Stage, the AM73915MZT microscope with EDOF capability, and the DinoCapture 2.0 Software, along with a third-party software for post-processing, you’ll be able to achieve remarkable results.
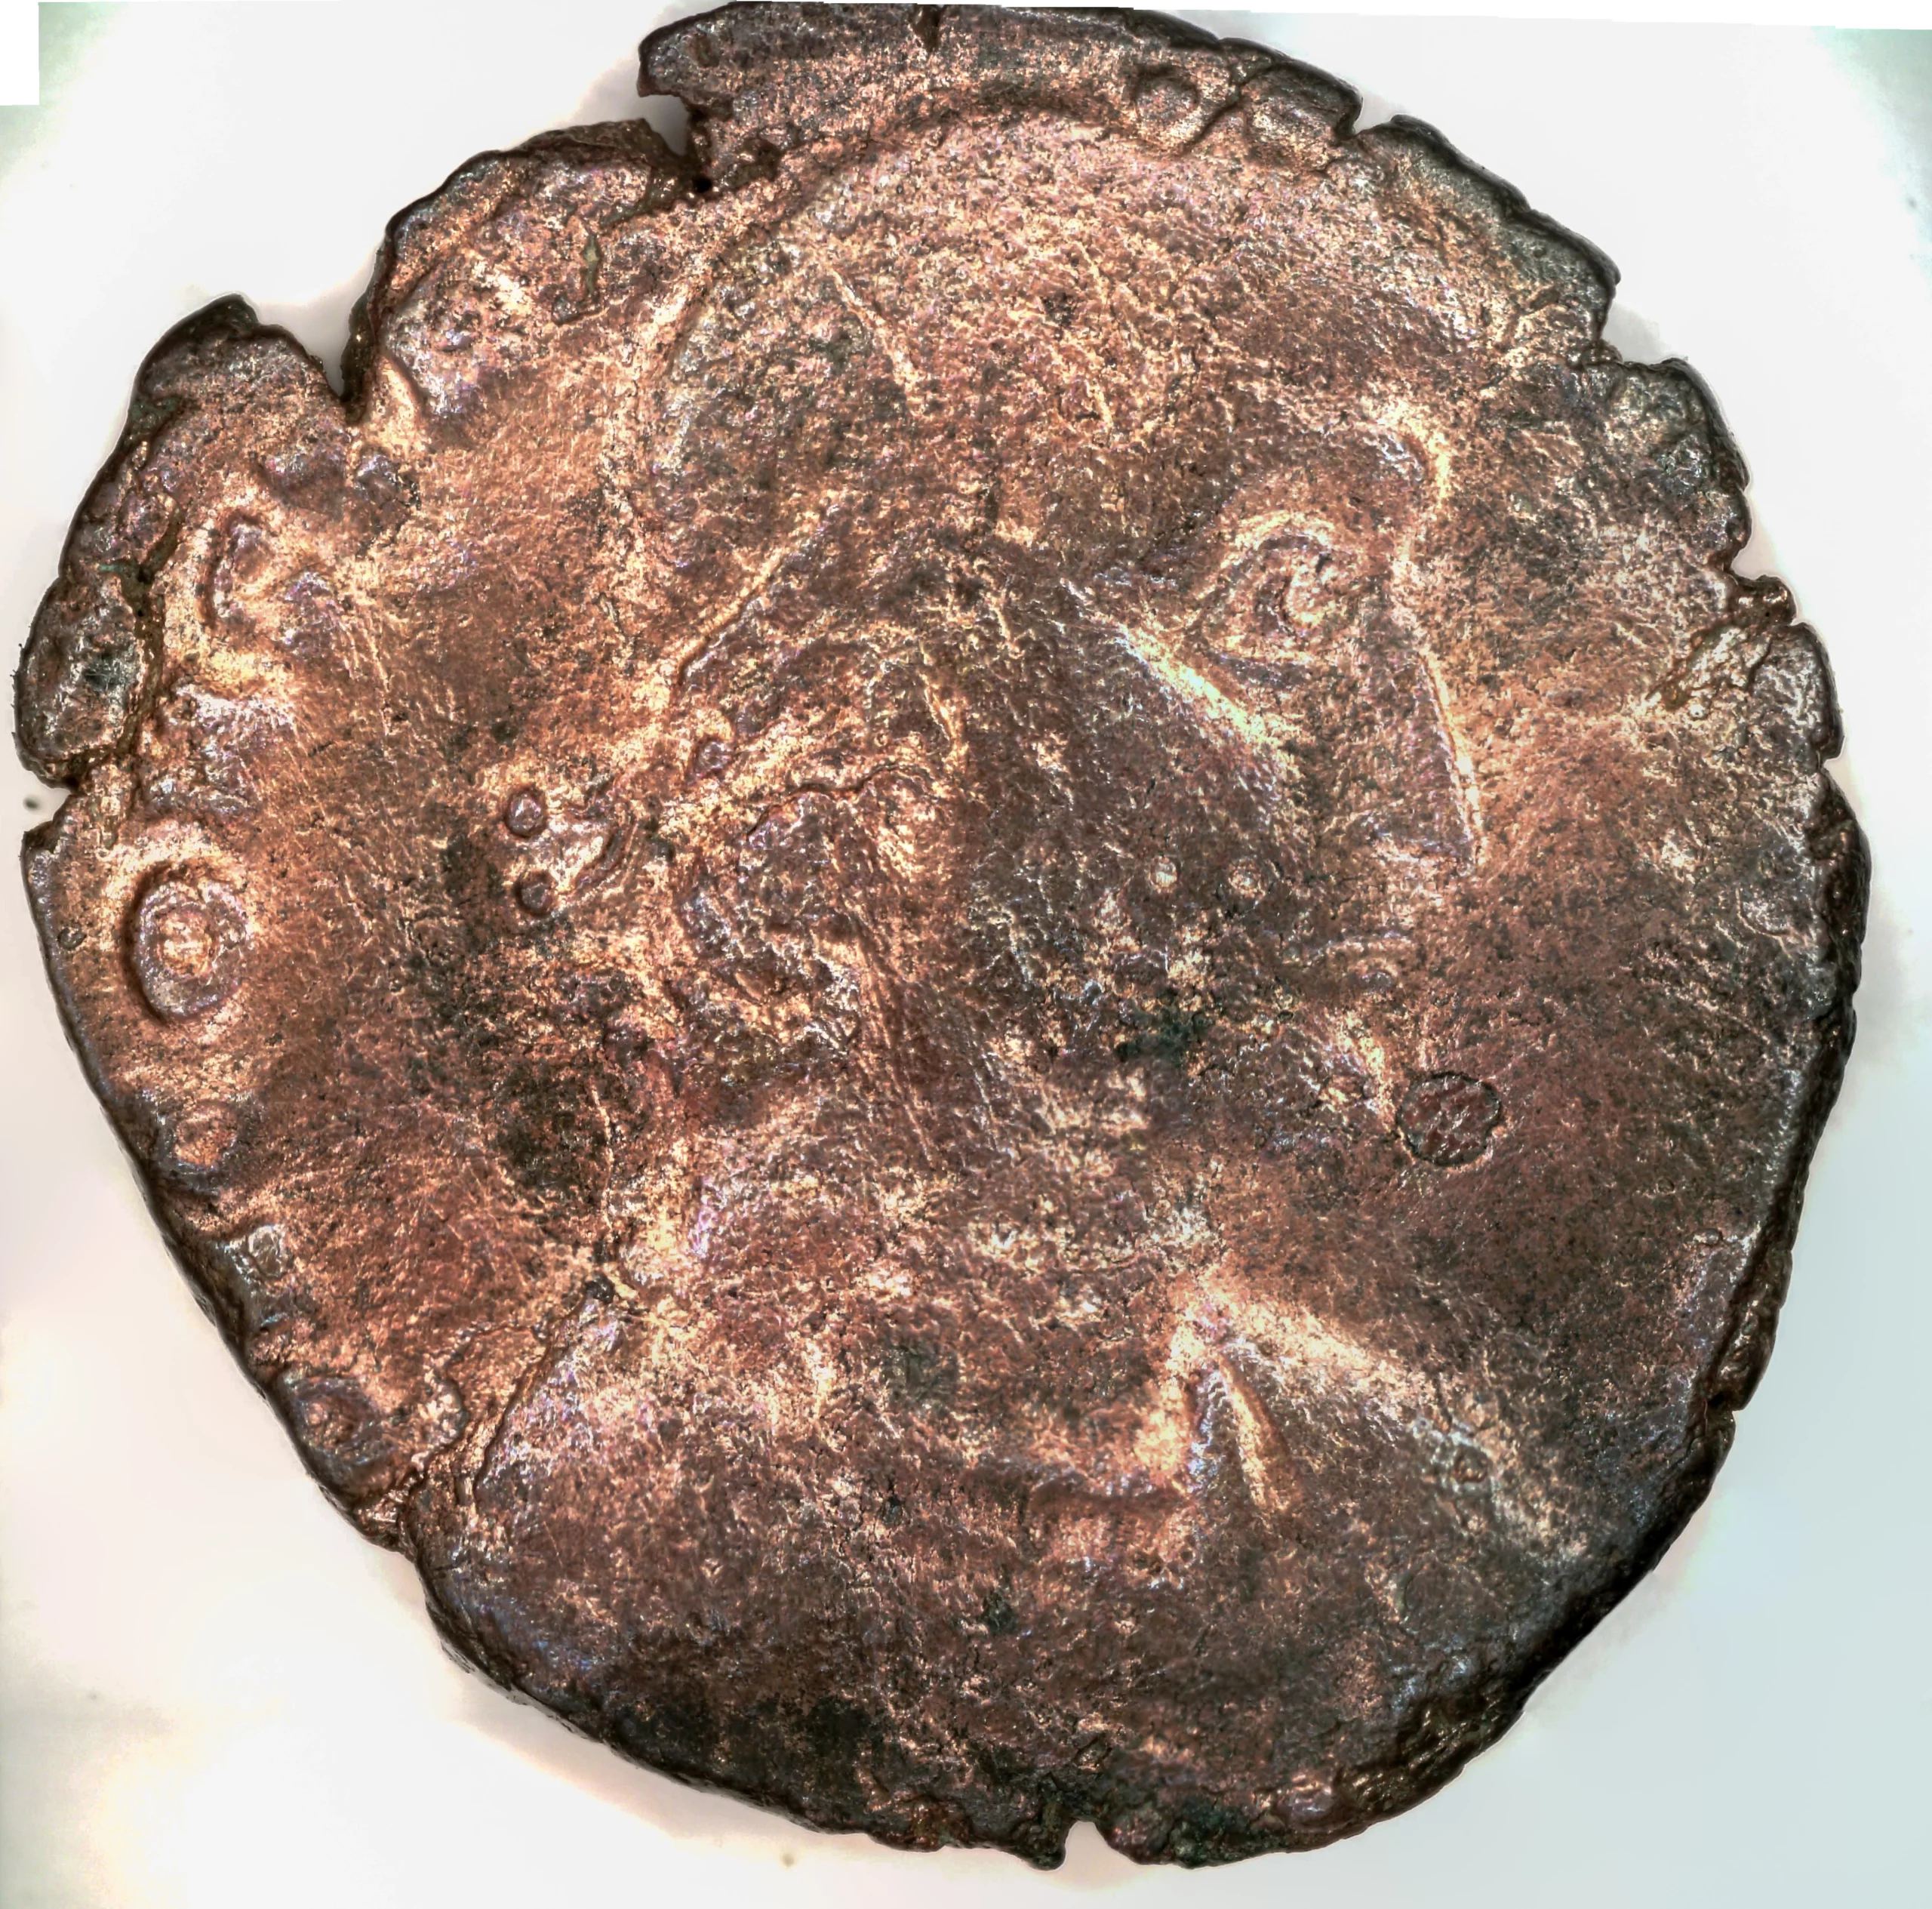
Follow these instructions to master the art of high quality photography and unlock hidden wonders with your Dino-Lite microscope. For our tutorial today we are using an ancient bronze coin.
Equipment:
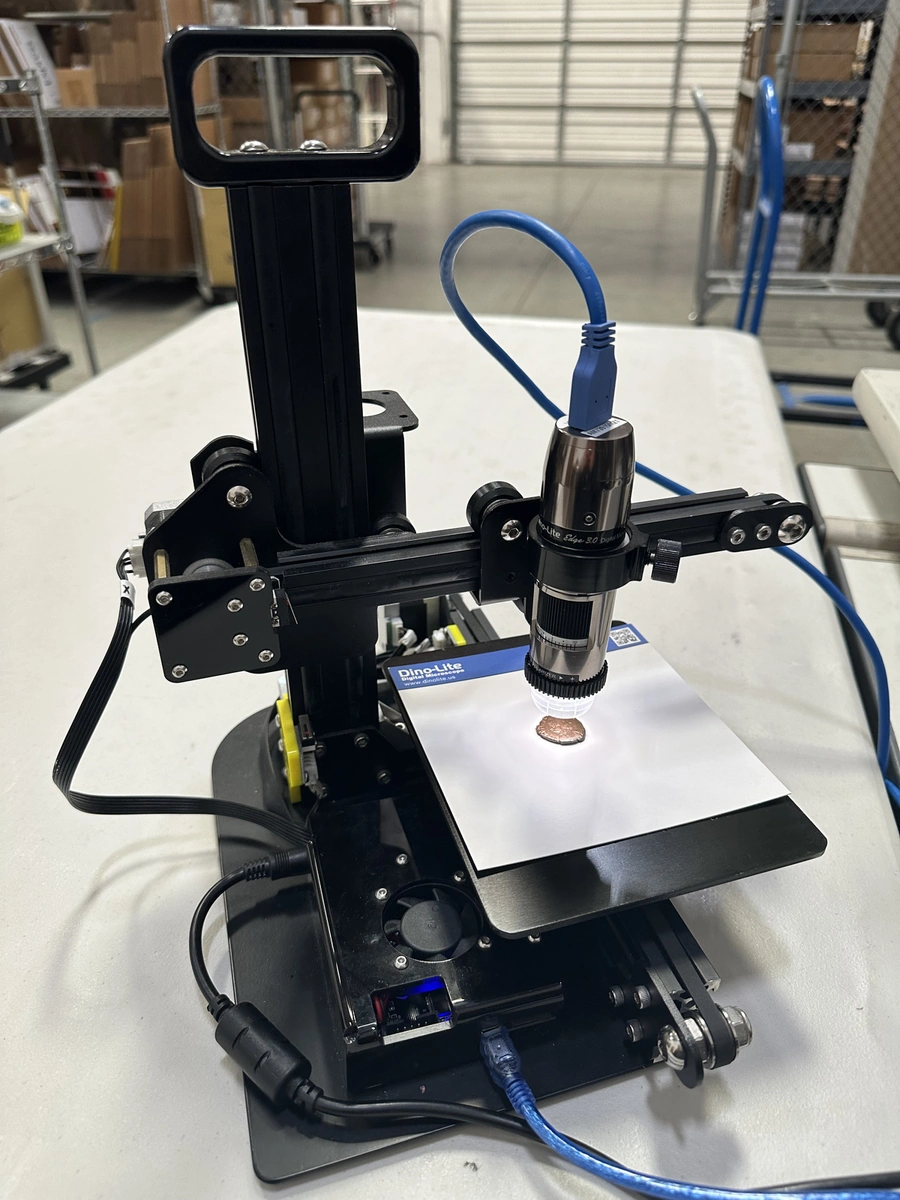
- Vision M1 Controlled Stage with All-in-One Software
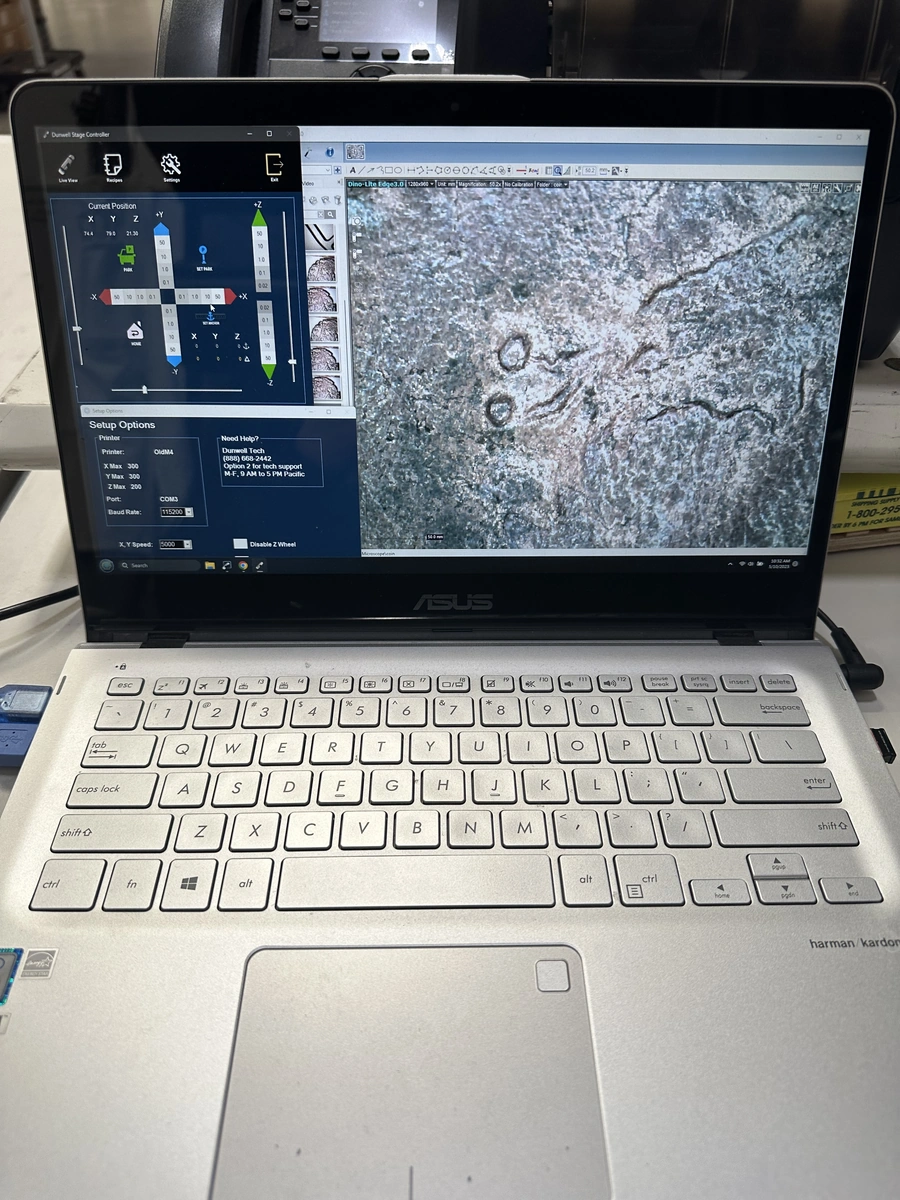
- DinoCapture 2.0 Software
- Stitching software, for our tutorial we used Adobe Lightroom
- AM73915MZT microscope with EDOF capability, essential for quality imaging of subjects that do not have completely flat surfaces
- *N3C-D2 cap (useful for coins)
Steps:
- 1. Set up your equipment:
- Connect the Vision M1 Controlled Stage to your computer and launch the All-in-One Software.
- Connect the AM73915MZT microscope to your computer and install the DinoCapture 2.0 Software.
- Attach the N3C-D2 cap to the microscope.
- 2. Adjust the microscope settings:
- Lock the zoom at 50x on the microscope.
- Position the microscope to focus on the very top left corner of the coin.
- 3. Capture EDOF photos:
- Take EDOF photos at multiple locations on the subject.
- Start from the left side and move to the right, then reverse the direction and move from right to left.
- Move down to the next row once you reach the edge of the viewing subject.
- Utilize the XYZ movement of the stage to move approximately 3mm for each photo.
- Ensure that each photo overlaps the previous one by more than 50%.
- 4. Adjust focus and minimize glare:
- Carefully adjust the Z axis of the microscope to achieve the best focus possible at each location.
- Use the microscope’s polarizer to reduce glare and enhance visibility.
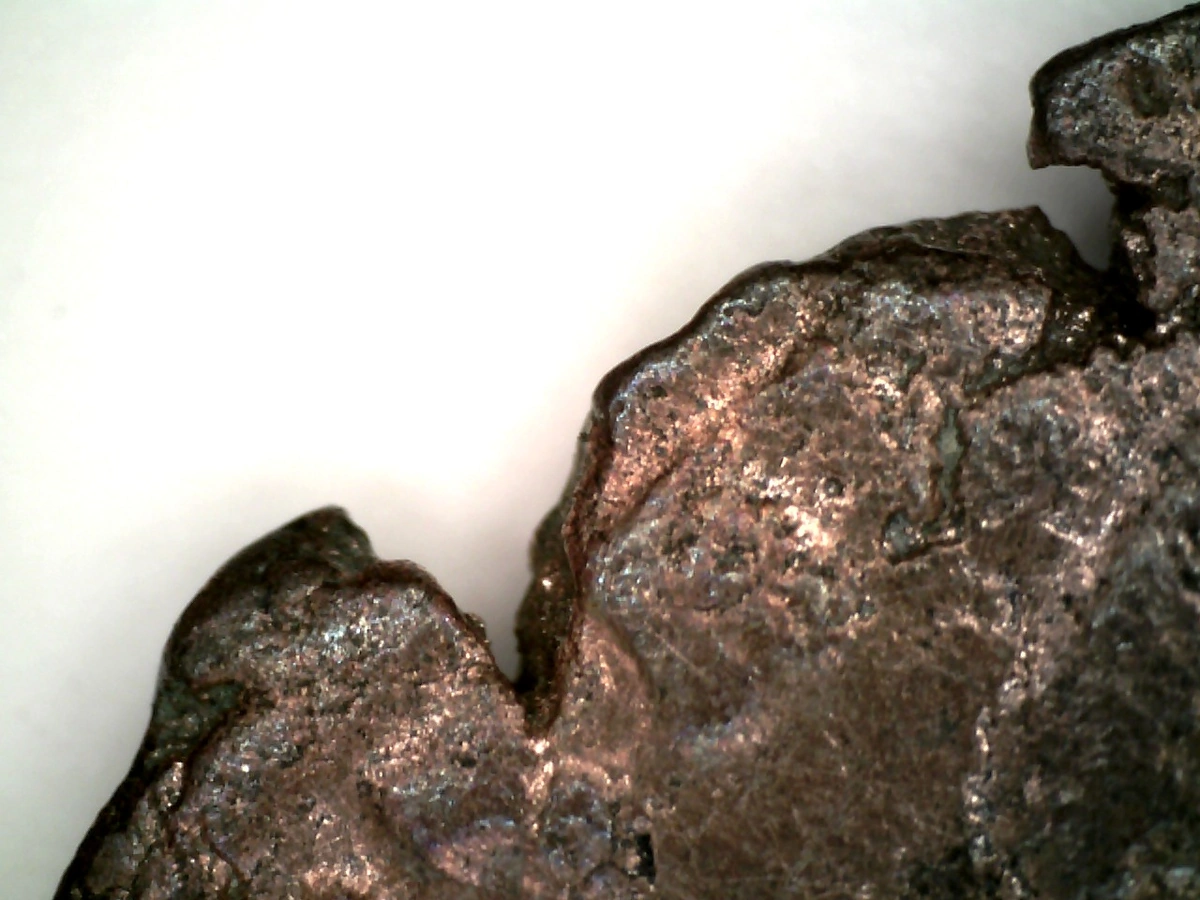
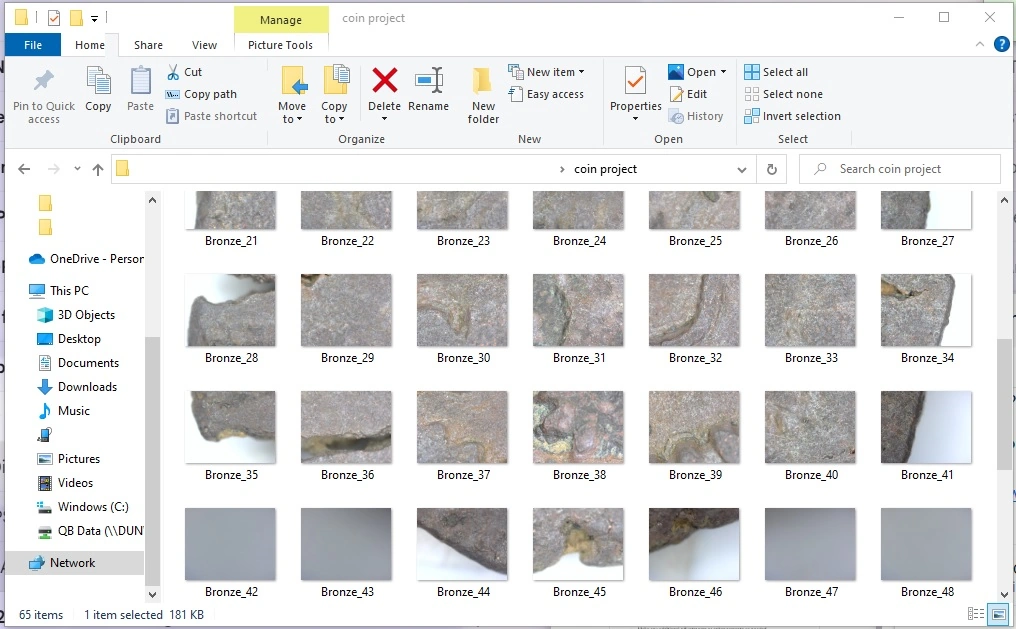
- 5. Capture a sufficient number of photos:
- Follow the previous steps until you have captured a sufficient amount of images. For this coin it was a total of ~80 photos.
- Make sure to maintain consistency in image quality and focus across all the photos.
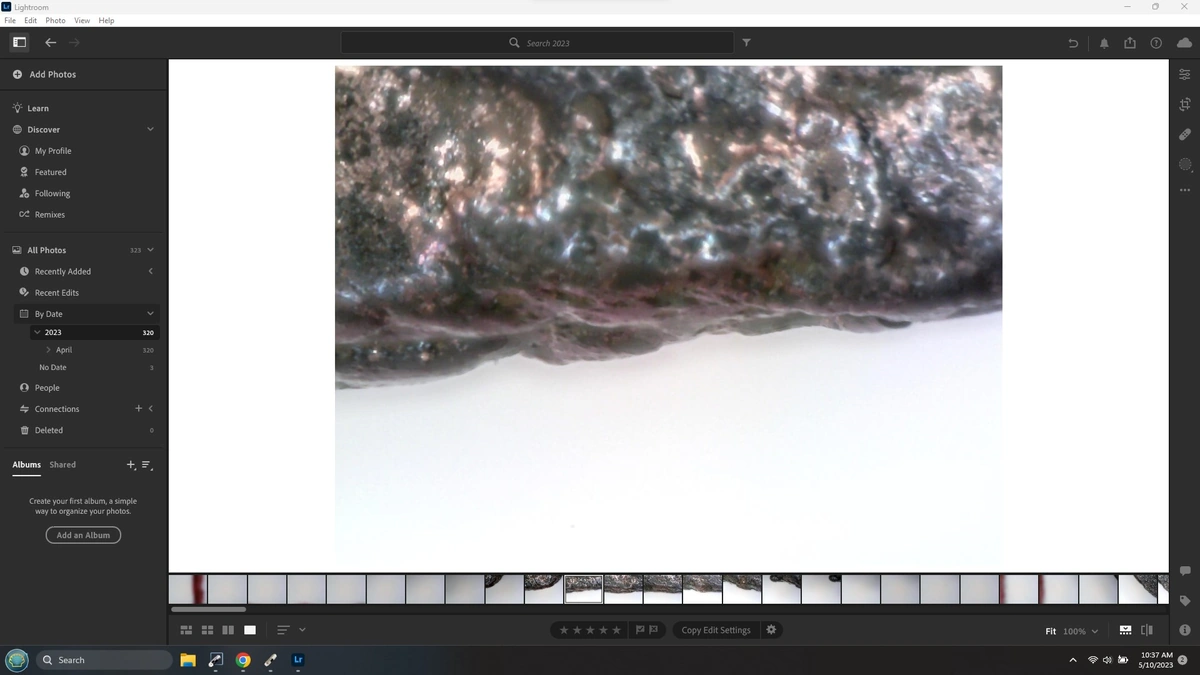
- 6. Stitch the photos together:
- Transfer the captured photos to your computer.
- Open Adobe Lightroom or similar software capable of creating panoramas.
- Import the photos and use the software’s panorama stitching feature to merge them together.
- Adjust any necessary settings to ensure a seamless and high-quality panorama.
- 7. Save and review the final image:
- Save the stitched panorama as a high-resolution image file.
- Review the image for overall quality, focus, and details.
- Make any additional adjustments or enhancements as needed.
By following these steps, you can create a detailed and high-quality coin image using a microscope, specialized software, and a controlled stage.
Final image
Click on the image to view and select the Magnifying glass for a closer look!
Note: There was a small bit of image compression applied to keep the file size browser-friendly.